Jupyter on Grex#
Jupyter is a Web-interface aimed to support interactive data science and scientific computing. Jupyter supports several dynamic languages, most notably Python, R and Julia. Jupyter offers a metaphor of “computational document” that combines code, data and visualizations, and can be published or shared with collaborators.
Jupyter can be used either as a simple, individual notebook or as a multi-user Web server/Interactive Development Environment (IDE), such as JupyterHub/JupyterLab. The JupyterHub servers can use a variety of computational back-end configurations: from free-for-all shared workstation to job spawning interfaces to HPC schedulers like SLURM or container workflow systems like Kubernetes.
This page lists examples of several ways of accessing jupyter.
Using notebooks via SSH tunnel and interactive jobs#
Any Python installation that has jupyter notebooks installed can be used for the simple notebook interface. Most often, activity on login nodes of HPC systems is limited, so first an interactive batch job should be started. Then, in the interactive job, users would start a jupyter notebook server and use an SSH tunnel to connect to it from a local Web browser.
After logging on to Grex as usual, issue the following salloc command to start an interactive job :
salloc --partition=compute --nodes=1 --ntasks-per-node=2 --time=0-3:00:00It should give you a command prompt on a compute node. You may change some parameters like partition, time, … etc to fit your needs. Then, make sure that a Python module is loaded and jupyter is installed, either in the Python or in a virtualenv, let’s start a notebook server, using an arbitrary port 8765. If the port is already in use, pick another number.
jupyter-notebook --ip 0.0.0.0 --no-browser --port 8765If successful, there should be:
http://g333:8675/?token=ae348acfa68edec1001bcef58c9abb402e5c7dd2d8c0a0c9
or similar, where g333 refers to a compute node it runs, 8675 is a local TCP port and token is an access token.
Now we have a jupyter notebook server running on the compute node, but how do we access it from our own browser? To that end, we will need an SSH tunnel.
Assuming a command line SSH client (OpenSSH or MobaXterm command line window), in a new tab or terminal issue the following:
ssh -fNL 8765:g333:8765 youruser@bison.hpc.umanitoba.caAgan, g333, port 8765 and your user name in the example above should be changed to reflect the actual node and user.
When successful, the SSH command above returns nothing. Keep the terminal window open for as long as you need the tunnel. Now, the final step is to point your browser (Firefox is the best as Chrome might refuse to do plain http://) to the specified port on localhost or 127.0.0.1, as in http://localhost:8765 or http://127.0.0.1:8765 . Use the token as per above to authenticate into the jupyter notebook session, either copying it into the prompt or providing it in the browser address line.
The notebook session will be usable for as long as the interactive (salloc) job is valid and both salloc session and the SSH tunnel connections stay alive. This usually is a limitation on how long jupyter notebook calculations can be, in practice.
The above-mentioned method will work not only on Grex, but on Compute Canada systems as well.
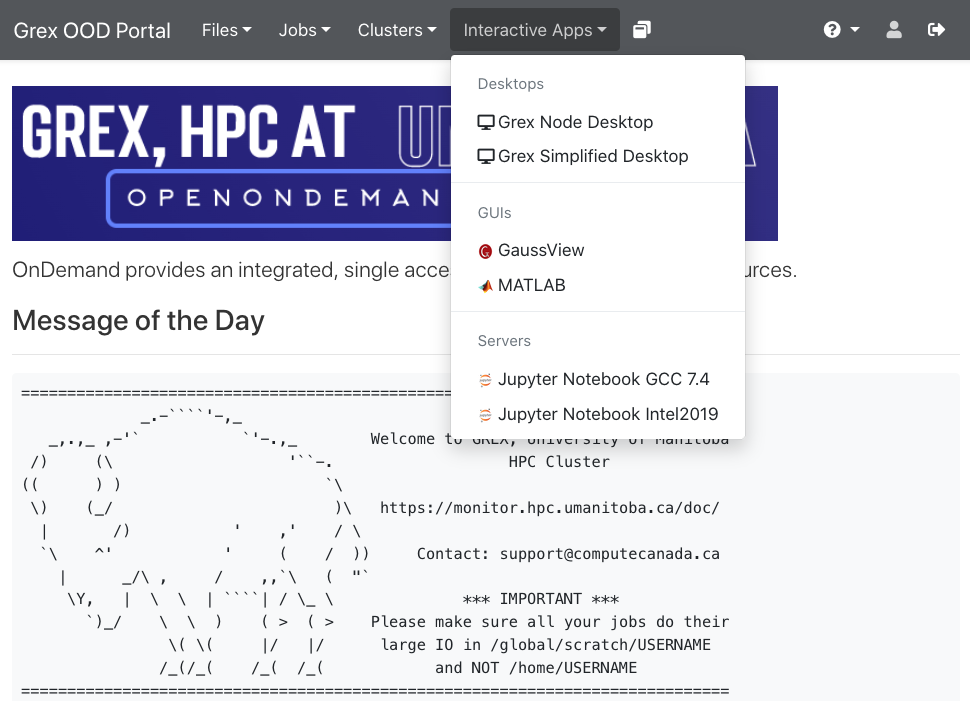
Using notebooks via Grex OOD Web Portal#
Grex provides a jupyter server as an OpenOnDemand dashboard application. This is much more convenient than handling SSH tunnels manually. The servers will run as a batch job on Grex compute nodes, so as usual, a choice of SLURM partition will be needed.
Presently, jupyter for these apps uses an installation of Grex’s Python 3.7 module. There are two versions of the app, one for the GCC 7.4 toolchain, another for Intel the 2019.5 toolchain.
Find out more on how to use OOD on the Grex OOD pages
To use R, Julia, and different instances or versions of Python, a jupyter notebook kernel needs to be installed by each user in their home directories. Check out the corresponding Compute Canada documentation here .
Other jupyter instances around#
There is a SyZyGy instance umanitoba.syzygy.ca that gives a free-for-all shared JupyterHub for UManitoba users.
Most of the Alliance’s (Compute Canada) HPC machines deployed JupyterHub interfaces: Cedar, Beluga, Narval and Niagara.