Introduction#
Globus is a service for fast, reliable, secure file transfer. Designed specifically for researchers, Globus has an easy-to-use interface with background monitoring features that automate the management of file transfers between any two resources, whether they are on a supercomputing facility, a campus cluster, lab server, desktop or laptop. Globus improves transfer performance over other file transfer tools, like rsync, scp, and sftp, by automatically tuning transfer settings, restarting interrupted transfers, and checking file integrity.
Globus transfers data between any two so-called “Globus endpoints” or “Data Collections”. Since the data can reside across different organizations, Globus provides a way to manage and link “identities” between these organizations to facilitate data transfers and data sharing.
University of Manitoba has a Globus subscription, so its users can participate in the Globus identity federation using their UMNetIDs and University’s authentication system, protected with UM multi-factor authentication. Globus can be accessed via the main Globus website or UManitoba or via the Alliance Globus portals.
There are two methods of using Globus that are available for Grex users: using a Grex Server endpoint, or using their own Personal Endpoints on Grex login nodes. Both methods are described below.
How to use Grex Server endpoint#
To use the UManitoba Grex HPC endpoint, a user will need to link its Globus “identity” to his master identity in the GlobusOnline portal. For the purpose of these instructions, we will use the UManitoba Globus portal. You could also use any other Globus identity you may have access to (for example, the Alliance / CCDB identity).
To access UManitoba Grex HPC endpoint, please follow these instructions:
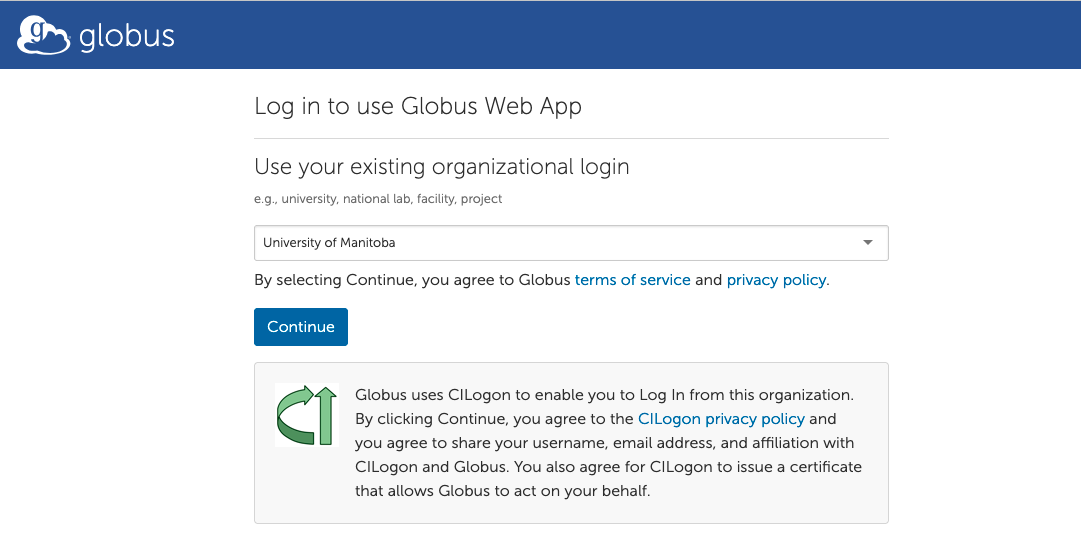
1. First, open UManitoba Globus portal in your browser. Use the menu under Use your existing organizational login and select University of Manitoba and click on Continue.
2. The previous step will redirect you to the UM Microsoft login webpage and ask for UM Multifactor authentication. After a successful authentication, you should be able to access Globus file manager as shown in the picture below:
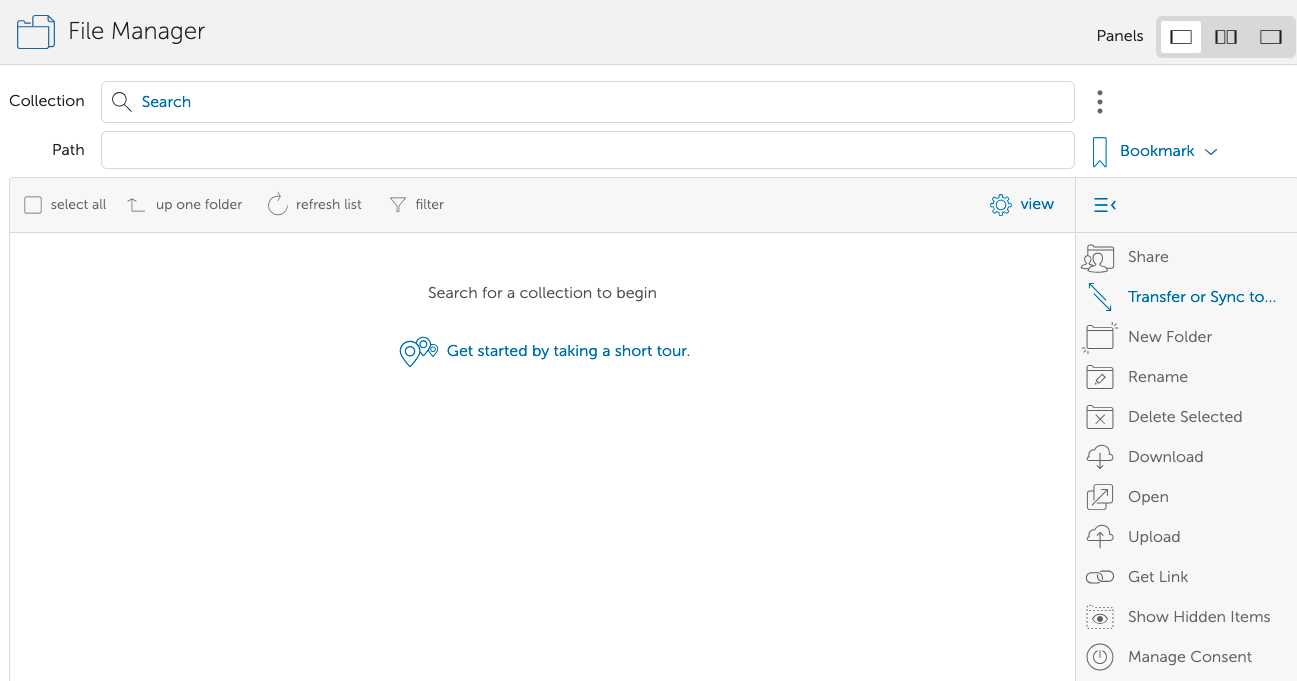
3. In the field Collection, search for UManitoba Grex HPC. For the first time, it should show a message asking to link a new identity:
None of your authenticated identities are from domains allowed by resource policies
Session reauthentication required (Globus Transfer)
a rprox.hpc.umanitoba.ca identity
as shown in the following screenshot:

4. Then, click on the link Continue
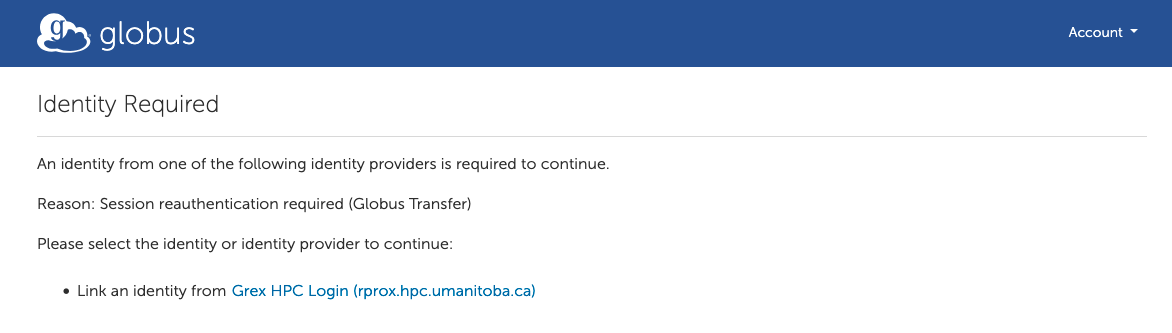
5. After clicking on the menu Continue, you will see this message:
Identity Required
An identity from one of the following identity providers is required to continue.
Reason: Session reauthentication required (Globus Transfer)
Please select the identity or identity provider to continue:
Link an identity from Grex HPC Login (rprox.hpc.umanitoba.ca)
Here is a screenshot of the message:
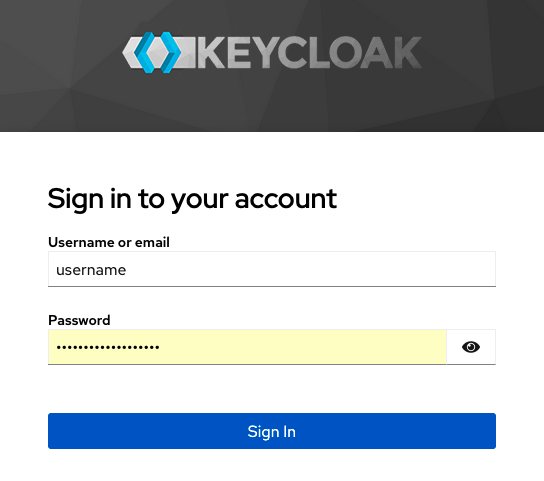
6. Then, click on the link ( rprox.hpc.umanitoba.ca ) from the previous step and redirect you the authentification page where you should use your Grex user name and password and your second factor authentication method you usually use to connect to Grex:
This will display a message to log into your primary identity:
Log into your primary identity.
In order to link username@rprox.hpc.umanitoba.ca to your Globus account, please log into your primary identity (username @ domainname ).
By selecting Continue, you agree to Globus terms of service and privacy policy.
7. Then, click on Continue to proceed. This will dispal a messsage:
Identity Required
An identity from one of the following identity providers is required to continue.
Reason: Session reauthentication required (Globus Transfer)
Please select the identity or identity provider to continue:
username@rprox.hpc.umanitoba.ca Link an identity from Grex HPC Login (rprox.hpc.umanitoba.ca)
8. Then select username@rprox.hpc.umanitoba.ca. This will redirect you to a file manager where your data under your home directory on Grex is shown:

Once your identity is linked, you can use Globus to initiate data transfer between Grex and any other Globus connection, like cedar for example.
Limitations of the Grex server endpoint : At the moment of writing, the “Grex HPC” server endpoint does not support browser-based “Upload” functionality. The server endpoint also does not support data sharing and data publishing. The only use case for this endpoint is data transfer between two Endpoints/Connections.
OpenOnDemand web portal on Grex now provides integration with the “UManitoba Grex HPC” endpoint: in the OOD’s File manager interface, the “Globus” button would redirect to the Globus WebApp on the endpoint, pointing to the current directory.
How to use Globus Web App to initiate transfer between two collections?#
Once the identity is linked as shown in the previous section, you could launch Globus web application to initiate file transfer between what is called Collections. Here are the steps to follow:
1. Launch Globus web app.
2. Select the two panel file manager.
3. Search for the collections you want to use and navigate through your directory.
4. Select required objects and initiate the transfer with the START button.
To search for a Collection of interest, you’d need to know is name, or organization, or keywords to enter into the Globus FileManager app Search field.
For example, for Grex, the server Endpoint is called UManitoba Grex HPC and can be found by ‘grex’ or ‘manitoba’ keywords. Other collections hosted at UManitoba systems, including personal endpoints, will come up in the search for ‘manitoba’ as well. A couple of collections/endpoints useful for Canadian users would be the Alliance’s National systems (such as Narval); the full list of the Alliance HPC Systems gives an idea on what words to search for. Another frequently used service that exposes data through Globus is UseGalaxy.ca . Finally, it is possible to use Globus to connect to the Alliance’s Object Storage on the Arbutus cloud .
How use personal endpoints and Globus CLI on Grex#
It is possible to use personal endpoints on Grex login nodes instead of the Grex (limited) server endpoint. Each user can use Globus Connect Personal to transfer data between any Server Endpoint and Grex. The method above is also useful for the use cases (data transfer automation) that require using Globus Command Line Interface (CLI) rather than the WebApp.
To get access to the Globus CLI and to create their personal endpoint on Grex, under their account, the following instruction have to be followed.
[~]$ module load globus
#
# Use an existing Globus identity to authenticate in the step below
#
[~]$ globus login --no-local-server
Please authenticate with Globus here:
------------------------------------
https://auth.globus.org/v2/oauth2/authorize?[...]
------------------------------------

Enter the resulting Authorization Code here: [...]

You have successfully logged in to the Globus CLI!

You can check your primary identity with
  globus whoami

For information on which of your identities are in session use
  globus session show

Logout of the Globus CLI with
  globus logout
[~]$ globus gcp create mapped <YOUR_NEW_ENDPOINT_NAME>
Message:     Endpoint created successfully
Endpoint ID: abcdef00-1234-0000-4321-000000fedcba
Setup Key:   12345678-aaaa-bbbb-cccc-87654321dddd
[~]$ globusconnectpersonal -setup 12345678-aaaa-bbbb-cccc-87654321dddd
[~]$ tmux new-session -d -s globus 'globusconnectpersonal -start'
### You can now start a transfer by navigating to https://globus.alliancecan.ca/
### and searching/choosing <YOUR_NEW_ENDPOINT_NAME> as the "Collection"
Once the endpoint had been created and the personal Globus server started, the endpoint will be visible/searchable in the GlobusOnline Web interface. Now it can be used for data transfers. The module load globus command also provides Globus command line interface (CLI) that can also be used to move data as described here: Globus CLI examples
Filesystems and symbolic links#
Often, there is more than one filesystem on a Linux machine the personal endpoint is started on. For example, an endpoint on Grex login node would have $HOME and /project available for sharing. However, on Linux, Globus does no share everything by default, other than users $HOME ! Even when there exist symbolic links to /project or /scratch, they would not yet be navigable in the Globus Web UI or CLI. Symbolic links across the filesystems do not work in Globus, unless both filesystems are shared!
To enable sharing filesystems other than $HOME, the following special file has to be edited: ~/.globusonline/lta/config-paths
By default Globus creates this file with only one line, ~/,0,1 that corresonds to user’s home directory. To add your project, or other filesystems, an extra line per filesystem must be added to the file.
The example below shows a template ~/.globusonline/lta/config-paths file for Grex.
# modify the file as needed. Each line is of the format Path,SharingFlag,RWFlag.
# the SharingFlag must be 0 for non-Globus+ endpoints.
cat ~/.globusonline/lta/config-paths
~/,0,1
/scratch/,0,1
/project/<YOUR_PROJECT_ID>/,0,1
Note that you would replace <YOUR_PROJECT_ID> above with your real path to the /project filesystem. One way to get it on Grex is to examine the output of the diskusage_report script.
Another, more general way, is to use realpath command to resolve the project symlink, as in realpath /home/${USER}/projects/def-<YOUR_PI>/ .
More information about configuring the Paths is available at Globus Documentation on Linux Endpoints .
Managing personal endpoints#
It is a good practice to not to keep unnecessary processes running on Grex login nodes. Thus, when all data transfers are finished, user should stop their Globus server process running personal endpoint as follows:
[~]$ tmux kill-session -C -t globusOnce an endpoint had been created, there is (usually) no need to repeat the above steps creating a new endpoint. To restart the same existing endpoint, as needed for new data transfer sessions, it will be enough to run:
[~]$ tmux new-session -d -s globus 'globusconnectpersonal -start'A more general guide on how to use Globus personal endpoint on a Linux system, can be found on the Frontenac “Data Transfers” page . This guide does not require a globus software module present on the system.
Using Upload button and HTTP access#
Globus v.5 adds a new feature to server endpoints that allows for using HTTP protocol (instead of the traditional globus-url-copy) . This feature can be used from the Web UI (Upload button), and from CLI for accessing Globus using the HTTPS URL someone had shared with you.
Note that the Upload feature is not available for Personal Globus endpoints. It only can be used for properly configured Server endpoints.
External links#
- Globus official Documentation
- Globus CLI Documemtation
- DRAC Globus Wiki page
- Instructions on using Globus for UseGalaxy Canada
- Check out the ESNet website if you are curious about Globus, and why large data transfers over WAN might need specialized networks and software setups.